Human Resources
The HR module is the people hub of ERPX. It covers everything from configuring your org structure and pay rules, through hiring and daily operations (attendance, leave, payroll), to performance, exits, and reporting — in one connected system.
When someone joins, their employee record becomes the single source of truth. Shift assignments, leave balances, salary structures, onboarding checklists, appraisals, and reports all point back to that record. When payroll runs, the numbers flow into Financials. When attendance is marked, overtime and leave stay consistent with the same masters you configured in Setup.
How HR is organized
Think of the module as three layers:
| Layer | What it is | Examples |
|---|---|---|
| 1. Setup | Configure once — rules and masters | Departments, leave types, salary components, appraisal templates |
| 2. Day-to-day | Run people processes every week | Employees, shifts, leave, payroll, expenses, lifecycle, performance |
| 3. Insights | See the big picture | Organization chart, company documents, reports |
Recommended first-time order: Setup (General → Masters → Leave → Payroll → Performance → Lifecycle) → Employee → Shift & Attendance → Leave → Payroll → then Lifecycle, Performance, and Reports. Each operational area depends on its setup masters being approved first.
Overall HR flow
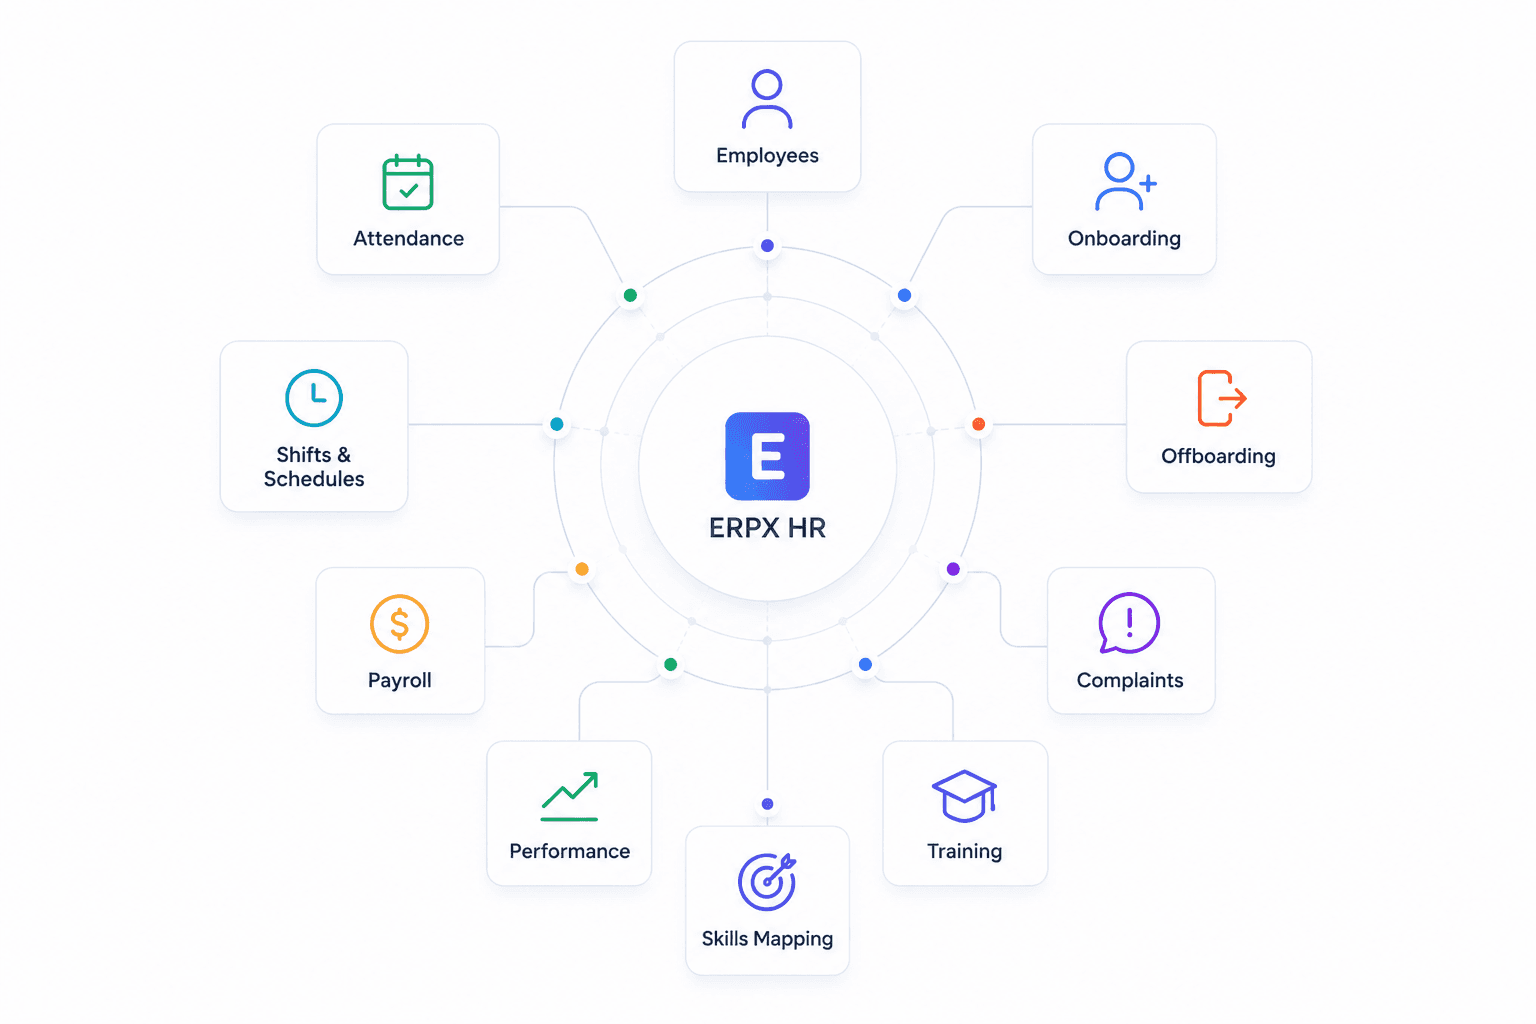
What you can do in HR
| Area | Purpose | Typical users |
|---|---|---|
| Setup | Org structure, HR year, leave/payroll/performance/lifecycle masters | HR Admin |
| Employee | Hire and maintain the employee master (personal, job, bank, documents) | HR |
| Shift & Attendance | Shifts, daily attendance, check-ins, timesheets | HR / Supervisors |
| Leave | Policies, allocations, applications, balances | HR / Employees |
| Payroll & Salaries | Structures, payroll runs, slips, benefits, additional salary | HR / Finance |
| Expense Claim | Expense types, claims, advances | Employees / HR |
| Employee Lifecycle | Onboarding, offboarding, skills, training, complaints, check-ins | HR |
| Performance | Goals, appraisals, reviews, calibration, 1-on-1s | Managers / HR |
| Organization Chart | Reporting hierarchy from Reports To | Everyone |
| Company Documents | Policies and handbooks for HR / employee portal | HR |
| Reports | Headcount, attendance, leave, payroll, expenses | HR / Finance / Managers |
How the pieces connect
Setup is not optional busywork — it unlocks the screens your team uses every day:
| You configure… | So you can… |
|---|---|
| Departments, designations, branches, levels | Place employees correctly in the company |
| HR Period + holiday lists | Know the leave/benefits year and which days are off |
| Leave types + policies | Allocate balances and process leave applications |
| Shift types | Assign schedules and mark attendance (including from check-ins) |
| Salary components + structures + tax slabs | Assign pay packages and run payroll |
| Onboarding / offboarding templates | Run hire and exit checklists consistently |
| KPIs, cycles, templates, score labels | Run appraisals and reviews |
From hire to pay
After Setup is complete, a typical employee path looks like this:
In practice:
- Create the employee and fill job, bank, and reporting fields.
- Assign a shift, leave policy, and salary structure (and start onboarding if you use templates).
- Capture presence via attendance / check-ins (web or ERPX Desktop ).
- Process leave so balances stay accurate before payroll.
- Run payroll, generate slips, then pay and report.
ERPX Desktop for check-ins
For shop-floor and office attendance, ERPX includes a Windows desktop app built for badge scanning and kiosk use — not only browser-based punches.
Download & install: ERPX Desktop on texinnova.com
| Capability | What it means for your team |
|---|---|
| Organisation-aware login | Sign in with ERPX email, password, and Organisation URL |
| Attendance dashboard | Manage scan modes, sync employees, and see today’s activity |
| Kiosk mode | Turn a PC into a self-service terminal — scan barcode/QR badge or type employee ID |
| Offline-first | Keep capturing punches without internet; sync when the connection returns |
| Auto-updates | Silent background updates on Windows 10 / 11 (x64) |
Check-ins from ERPX Desktop land in HR → Shift & Attendance → Employee Check-ins. Enable Auto Attendance on the shift type when you want punches to build daily attendance automatically. See Shift & Attendance for the full attendance workflow.
Typical install path (once per device):
- Install the trust certificate (required outside the Microsoft Store).
- Download the installer (
.appinstalleror.msixbundle). - Install, launch from the Start Menu, and sign in with your organisation URL.
- Use the employee portal or switch to Kiosk mode for dedicated badge scanning.
Full steps, certificate notes, and downloads are on the ERPX Desktop page .
Browse by section
General, HR Masters, Leave, Payroll, Performance, and Lifecycle setup — configure once before operations.
Create and maintain employee records — the foundation for every other HR process.
Shift types, assignments, daily attendance, check-ins (web + ERPX Desktop), and timesheets.
Allocate leave, assign policies, and process leave applications.
Salary structure assignment, payroll runs, slips, benefits, additional salary, and retention bonus.
Expense types, reimbursement claims, and employee advances.
Onboarding, offboarding, skill map, complaints, training, and check-ins.
Appraisals, goals, reviews, calibration, and 1-on-1 meetings.
Visual reporting hierarchy based on each employee’s Reports To.
Upload policies and handbooks for HR and the employee portal.
Employee, attendance, leave, payroll, and expense & benefits reports.
Typical status flow
Most HR documents follow a simple lifecycle:
Examples:
- Masters (department, leave type, salary component): Draft → Approved/Active → Inactive
- Leave application: Draft → Pending → Approved / Rejected / Cancelled
- Expense claim / advance: Draft → Submitted → Approved → Paid
- Payroll entry: Draft → Approved → Slips generated → Ready for payment → Completed
Many masters cannot move from Active back to Draft. Approve carefully — correct the record, then Inactive / Cancel if it should no longer appear in dropdowns.